How to Apply Peel and Stick Wallpaper in Bathrooms Without Bubbles
Peel and stick wallpaper is one of the easiest ways to upgrade your bathroom, but air bubbles can turn a sleek finish into a DIY nightmare. Wondering how to apply peel and stick wallpaper in bathrooms without bubbles? The key is precision, patience, and a few pro tricks.
Bathrooms present a unique challenge due to humidity, corners, and textured surfaces. But with the right approach, you can achieve a smooth, bubble-free application that lasts. Whether you’re revamping a powder room or tackling a full remodel, this guide has you covered.
Why Peel and Stick Wallpaper Is Perfect for Bathrooms
Peel and stick wallpaper has surged in popularity for a reason: it’s user-friendly, removable, and requires no messy glue. For renters or homeowners who like to update their space often, it’s a game-changer.
In bathrooms, where moisture levels are high, peel and stick options excel when applied correctly. Unlike traditional wallpaper, there’s no paste to worry about bubbling from humidity. And when it’s time for a new look? Just peel it off.
Check out our peel and stick bathroom wallpaper collection for designs made specifically for moist environments.
The Biggest Bubble-Causing Mistakes to Avoid
Before diving into the “how-to,” let’s tackle the common mistakes:
- Skipping wall prep. Dirt, residue, or moisture leads to poor adhesion and bubbles.
- Rushing the process. Speed leads to misalignment and air pockets.
- Not using a smoothing tool. Fingers aren’t enough.
- Peeling too much backing at once. This makes it hard to control placement.
- Ignoring humidity. Applying wallpaper in a steamy room is a recipe for bubbles.
Tools You Need Before You Start
Before you apply a single panel, gather these essentials:
- Level or plumb line
- Measuring tape
- Sharp utility knife
- Smoothing tool or plastic scraper
- Microfiber cloth
- Ladder (for higher walls)
- Spray bottle with mild cleaner
- Hairdryer (optional for heat-activating adhesive in cold conditions)
Step-by-Step Guide: Applying Wallpaper Without Bubbles
Step 1: Clean and Dry the Walls
Start with a thorough cleaning. Use a mild cleaner to remove dust, grime, or mildew. Let the walls dry completely. Any moisture trapped underneath can create bubbles later.
Want even more inspo? Explore our bathroom wallpaper ideas that instantly transform your space.
Step 2: Measure Twice, Cut Once
Measure the wall height and cut each wallpaper strip 2–3 inches longer than needed. This gives you room to trim precisely at the top and bottom.
Mark a straight vertical line using a level to guide your first strip—this keeps everything aligned.
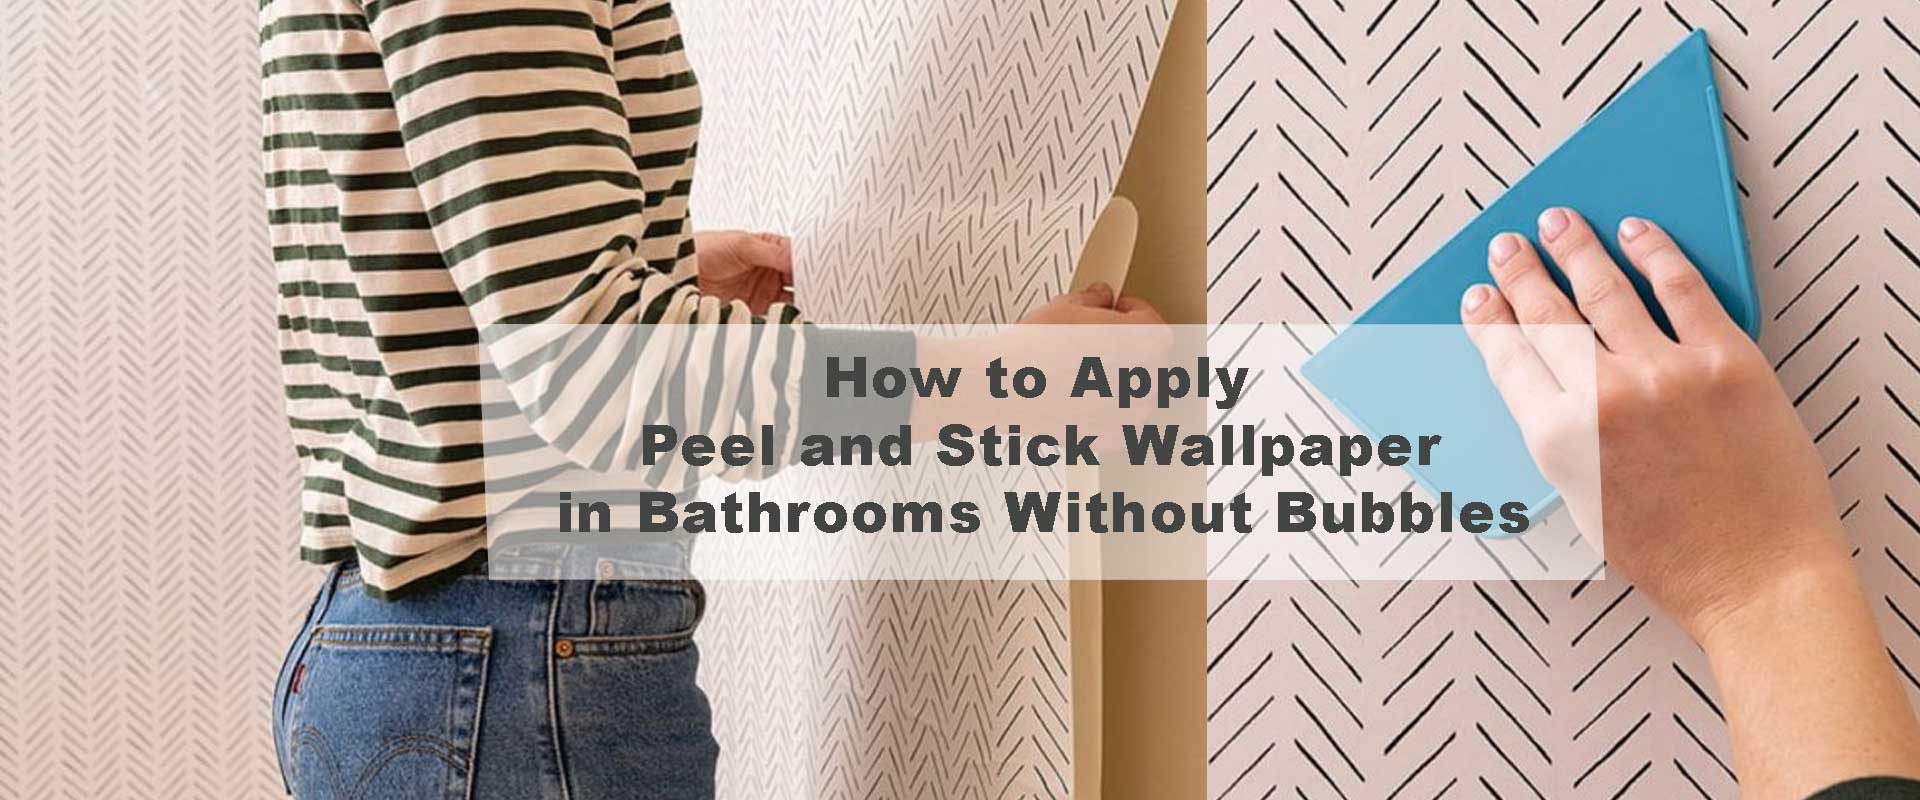
Step 3: Peel Slowly, Stick Smoothly
Peel about 6–8 inches of the backing from the top, then align and press the wallpaper onto the wall. Use one hand to slowly peel while the other hand smooths the wallpaper from the center outward.
Avoid pulling the full backing off at once—this makes it hard to control and invites air pockets.
Step 4: Use a Smoothing Tool as You Go
With each section, use a plastic smoothing tool to eliminate air bubbles. Push from the center out toward the edges.
If you see a bubble form, lift that section gently and reapply, smoothing as you go.
Step 5: Deal with Seams and Corners Properly
Overlap slightly at seams, then double-cut (a technique where you cut through both layers) for a seamless look. For corners, make relief cuts to help the wallpaper lay flat.
Be patient in corners—rushing here causes major bubbling.
How to Handle High Humidity (Without Ruining the Wallpaper)
Bathrooms are humid by nature. Here’s how to fight back:
- Apply when the room is cool and dry, not right after a shower.
- Run a fan or dehumidifier before and after installation.
- Use a hairdryer on low heat to activate adhesive and flatten edges if needed.
For more pro insight, check out our guide on how to waterproof wallpaper for bathrooms.
Common Problems and Quick Fixes
Bubble won’t go away?
- Prick it with a pin and smooth air out gently.
Edges peeling?
- Reheat with a hairdryer and press firmly for 30 seconds.
Wrinkled area?
- Lift carefully and reapply, smoothing with your tool.
Explore our collection of small bathroom wallpaper designs for layouts that work even in tight spaces.
Maintaining a Bubble-Free Finish Long-Term
- Keep the bathroom well-ventilated to reduce steam.
- Wipe walls gently with a dry or damp microfiber cloth.
- Avoid direct water spray on wallpaper.
For longevity tips, read how long bathroom wallpaper lasts in high moisture areas.
Pro Tips for Tricky Areas (Around Sinks, Outlets & Fixtures)
- Use a sharp blade to trim around outlets precisely.
- Remove light switch covers and replace after application.
- For sinks or vanities, start your application away from the splash zone and work toward it.
Looking to wallpaper behind a sink? Here’s what you need to know: Can You Put Wallpaper Behind a Bathroom Sink?
FAQs: Peel and Stick Wallpaper in Bathrooms
Will peel and stick wallpaper work in a steamy bathroom?
Yes, but only if applied to clean, dry walls and sealed properly.
Can I apply it over tile?
It’s possible, but only on flat tiles. For textured or uneven surfaces, results may vary.
What if I mess up? Can I reposition it?
Absolutely. That’s one of the benefits—it’s removable and repositionable.
Is it renter-friendly?
100%. Peel and stick wallpaper leaves no residue when removed properly.
For more answers, check our article on can removable wallpaper be used in bathrooms safely.
Peel and Stick vs. Traditional Wallpaper: Quick Comparison
| Feature | Peel and Stick Wallpaper | Traditional Wallpaper |
|---|---|---|
| Installation Effort | Low – DIY-friendly | Moderate to High – May require pro |
| Time Required | Quick – Often under 2 hours | Longer – Due to paste and drying |
| Tools Needed | Minimal – Just smoother & knife | Paste, brush, smoother |
| Surface Prep | Clean and dry wall | Clean, primed, sometimes sanded |
| Damage to Walls | Low – Doesn’t damage paint | High – May strip paint/drywall |
| Removability | Yes – Fully removable | No – Not reusable |
| Moisture Resistance | Good (if sealed) | Excellent (with proper adhesive) |
| Bubble Risk | Medium (can be avoided) | Low – Bubbles less likely |
| Cost Range | $30–$80 per roll | $40–$100 per roll + tools |
| Best For | Renters, quick upgrades | Long-term remodels |
Conclusion: Get That Smooth, Stylish Look
Applying peel and stick wallpaper in bathrooms without bubbles is absolutely doable. With the right tools, clean prep, and careful smoothing, your walls can go from plain to Pinterest-worthy. Taking the time to prime walls, eliminate dust, and work slowly during installation ensures a flawless finish that lasts. This approach not only prevents bubbling but also helps your wallpaper maintain its charm even in moisture-prone spaces.
Whether you’re aiming for bold patterns that make a statement or subtle textures that add elegance, peel and stick wallpaper gives you the flexibility to refresh your bathroom without the hassle of traditional paste. For inspiration and moisture-friendly designs, explore our bathroom wallpaper collection and discover styles that turn any bathroom into a polished, stylish retreat.