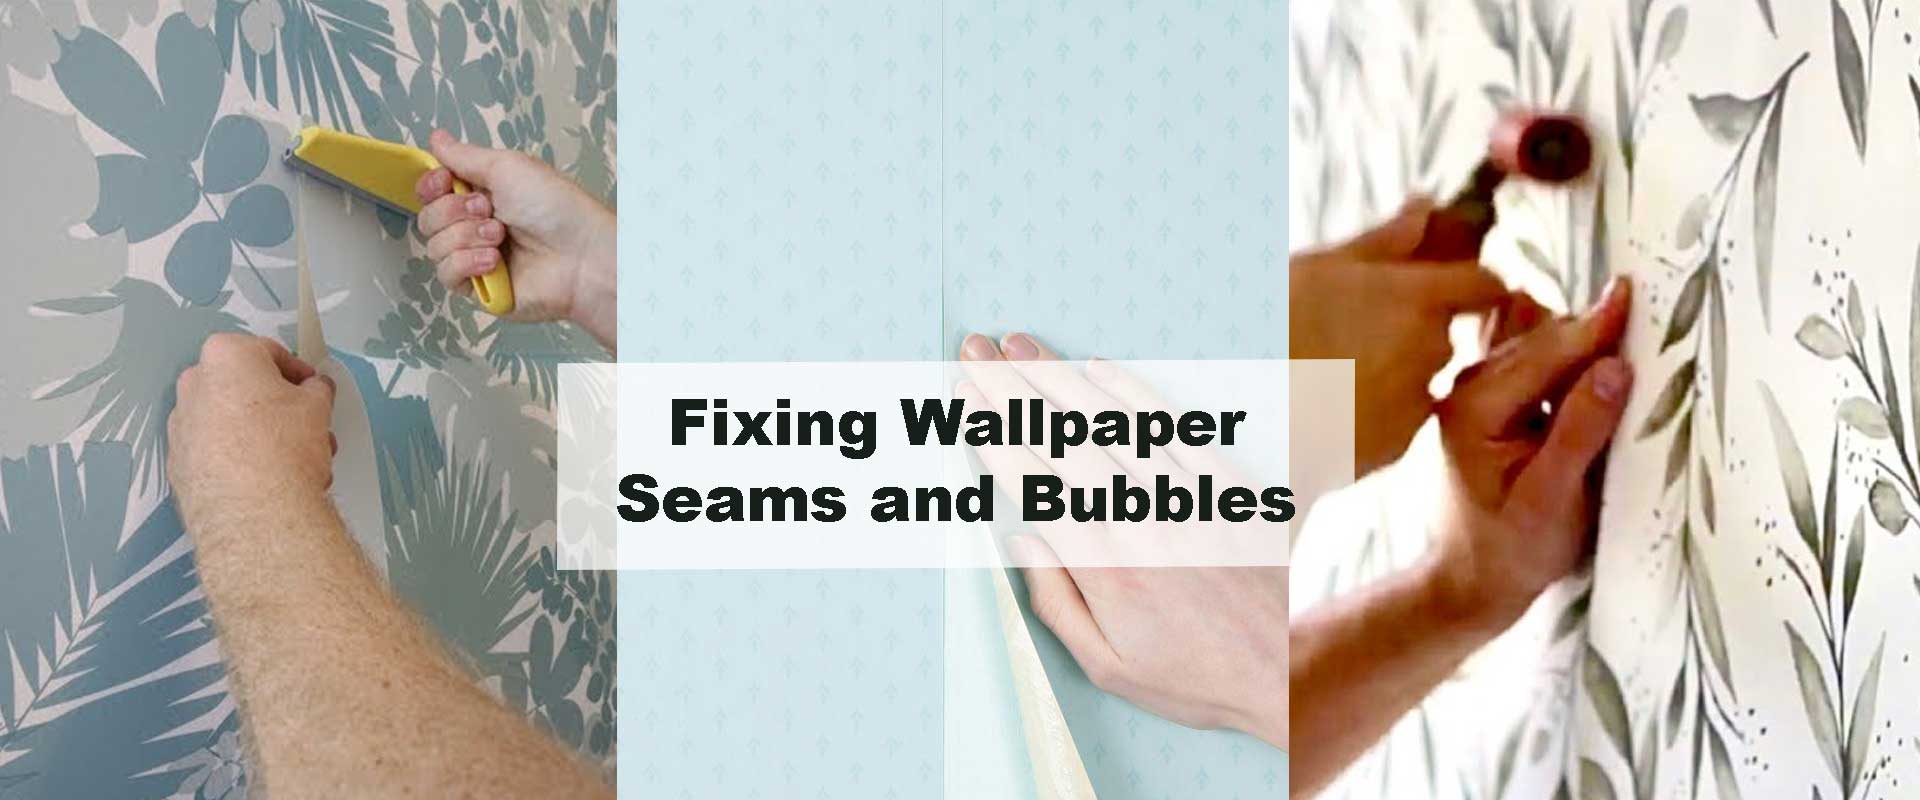
Fixing Wallpaper Seams and Bubbles
Noticing small lifts or air pockets after installing your wallpaper can be frustrating, but fixing wallpaper seams and bubbles doesn’t require starting over. With the right methods and attention to detail, you can restore that perfectly smooth finish your floral wallpaper deserves and prevent the same issue from returning later.
Understanding Why Wallpaper Seams and Bubbles Appear
Even with professional installation, small imperfections can surface. Seams may lift or bubbles may form because of trapped air, uneven adhesive, or excess wall moisture. Recognizing these causes early helps prevent larger damage over time.Common Causes of Lifting Seams
- Insufficient Adhesive: Weak or uneven glue application fails to bond the edges properly.
- Temperature Fluctuations: Frequent humidity shifts cause wallpaper to expand or contract.
- Overstretching During Installation: Pulling too tightly can weaken edge adhesion and misalign floral motifs.
These factors also explain why delicate designs — such as aesthetic floral wallpapers with soft inks and intricate patterns — sometimes show minor imperfections more visibly. Insights from How to Align Floral Patterns Perfectly highlight how proper pattern alignment during installation reduces the chance of future seam issues.
How to Fix Peeling Wallpaper Seams
Even a beautifully installed floral wall can develop slightly lifted edges over time. Peeling seams often appear along joints or corners where the adhesive has weakened. Tackling the issue early prevents visible separation and keeps your wallpaper’s design flowing gracefully from panel to panel.
Step-by-Step Seam Repair Method
- Loosen the Edge Gently: Use a palette knife or precision blade to lift the peeling area without tearing the paper.
- Apply Fresh Adhesive: With a fine-tipped brush, spread a thin layer of wallpaper glue evenly beneath the lifted seam. Avoid over-saturating the paper.
- Smooth the Edge: Press the seam back into position using a seam roller or soft cloth, working from the center outward to remove trapped air.
- Clean the Surface: Wipe away any excess adhesive with a damp sponge to maintain the print’s natural finish.
💡 Pro Tip: Repeated floral motifs — like those in vintage botanical wallpapers — are forgiving during repairs, as their symmetrical vines and petals realign effortlessly. Designs from the Vintage Floral Wallpaper Collection are perfect examples of how delicate artistry meets practicality, allowing invisible seam restoration with minimal effort.
If you’re repairing seams after removing older paper, following the techniques in Removing Old Wallpaper Before Installing Florals ensures a cleaner base and stronger long-term adhesion.
Repairing Wallpaper Bubbles Without Replacing Panels
Air pockets are among the most common wallpaper issues, especially in humid spaces or on unprimed walls. Bubbles can distort patterns and cause uneven lighting reflections on your floral designs, but they’re simple to correct when treated carefully.
For Small Bubbles (Under 2 cm)
Use a sterilized pin or needle to puncture the center of the bubble. Then, press gently with a damp cloth or sponge, working outward until the trapped air escapes completely. The goal is to flatten without stretching the pattern — perfect for soft aesthetic floral wallpapers with delicate color transitions.
For Larger Bubbles (Over 2 cm)
- Cut a tiny X-shaped slit across the bubble using a sharp craft knife.
- Insert a fine artist’s brush through the slit and apply adhesive beneath the lifted section.
- Press both flaps down firmly and smooth with a roller or plastic card, moving from the center outward.
- Wipe away any visible glue before it dries to maintain a seamless texture.
This precise method restores the wall’s integrity and prevents recurrence — especially when combined with high-quality adhesive and proper wall priming. Matte floral designs, such as those within the Modern Floral Wallpaper Collection, tend to conceal minor touch-ups beautifully thanks to their soft finishes and subtle shading.
When working with bold prints or reflective inks, insights from How to Align Floral Patterns Perfectly can help preserve your wallpaper’s rhythm and symmetry during these detailed touch-ups.
Essential Tools for Seam and Bubble Repairs
| Tool | Purpose | Professional Tip |
|---|---|---|
| Wallpaper adhesive | Bonds lifted edges | Use clear adhesive for patterned designs |
| Seam roller | Flattens seams | Apply gentle pressure to avoid stretching |
| Craft knife | Makes precise cuts | Replace blades often for clean incisions |
| Pin or syringe | Removes air pockets | Create minimal punctures for clean results |
| Brush & cloth | Applies and cleans adhesive | Work carefully around printed motifs |
These tools also feature in DIY floral wallpaper installation processes, as shared in How to Install Peel & Stick Floral Wallpaper, where correct smoothing techniques prevent bubbling altogether.
Preventing Wallpaper Seams from Opening in the Future
A flawless wallpaper finish doesn’t just depend on installation — it also relies on careful preparation and steady environmental conditions. Small preventive steps go a long way in avoiding seam separation or bubbling later.
1. Prepare the Wall Thoroughly
Start with a perfectly smooth and dust-free surface. Any leftover paint flakes, plaster residue, or grease can interfere with adhesive strength. Sand lightly, fill imperfections, and wipe down the wall with a damp cloth. Once dry, apply a primer suitable for your wallpaper type — it ensures even adhesion and prevents peeling along seams.
2. Choose the Right Adhesive
Using the correct paste makes all the difference. Traditional papers need starch-based paste, vinyl floral wallpapers require vinyl-to-vinyl adhesive, and peel-and-stick versions depend on strong, clean surfaces rather than extra glue. Mismatched adhesives can cause long-term curling or uneven bonding, so always refer to manufacturer guidelines before applying.
3. Maintain Stable Temperature and Humidity
Floral wallpapers, especially those printed with layered inks, expand and contract slightly with environmental changes. Keep room temperatures consistent — ideally around 20°C (68°F) — and humidity balanced between 40–60%. Avoid installing wallpaper right after plastering or painting, when trapped moisture can cause premature seam lifting.
4. Align Patterns with Precision
Tension at seams often comes from stretching panels too tightly. Handle each strip gently and focus on matching the floral motifs rather than pulling edges into alignment. This technique maintains the wallpaper’s natural elasticity and ensures that blossoms, vines, and petals flow continuously across the wall.
Classic prints from the Floral Wallpapers Collection respond beautifully to this method — their layered artistry remains seamless and elegant when properly aligned and supported by consistent adhesive coverage.
Repairing Textured or Vinyl Floral Wallpapers
Textured and vinyl wallpapers deliver dimension and durability but demand gentle handling during maintenance. Their protective coating resists moisture but also limits glue absorption, so using the correct repair materials is crucial.
- Use vinyl-to-vinyl adhesive for secure reattachment.
- Smooth seams using a soft cloth-wrapped roller to preserve raised textures.
- Avoid excessive moisture during cleaning, as water may seep into joints.
In richly saturated palettes — such as those found in the Dark Floral Wallpaper Collection — light reflects differently across textures. Precise seam care prevents visible edges, ensuring that deep blooms and botanical shadows remain captivating without disruption.
Managing Humidity for Long-Term Adhesion
Moisture is a hidden enemy of wallpaper longevity. Bathrooms, kitchens, and laundry areas experience steam and condensation that gradually weaken adhesive bonds.
To protect your wallpaper from peeling or bubbling:
- Apply a moisture-resistant primer before installation.
- Choose an adhesive rated for high-humidity environments.
- Seal vulnerable edges with a thin layer of clear acrylic protector.
These steps strengthen adhesion while preserving the design’s vibrancy. For detailed insights on moisture control and waterproofing methods, How to Waterproof Wallpaper in Bathrooms outlines effective practices to maintain stability in humid rooms.
Restoring Old Wallpaper Seams
Over the years, even well-installed wallpaper can loosen slightly as adhesives age. Restoring it requires care rather than replacement:
- Clean each seam with a soft, damp cloth to remove dust.
- Apply a small amount of seam adhesive beneath lifted edges.
- Align any mismatched patterns precisely before pressing down.
- Smooth gently with a roller and let dry completely.
Subtle prints with soft, vintage floral tones conceal touch-ups naturally, adding charm and authenticity to heritage-inspired interiors. Hand-painted botanicals or faded vines regain their elegance with minimal effort when maintained this way.
How to Prevent Bubbles Before They Form
Smooth installation is your best safeguard against bubbling and uneven adhesion.
- Always prime walls to seal porous surfaces.
- Apply paste evenly with a roller or brush — no thick globs or dry patches.
- Use a squeegee or smoothing brush to push air outward from the center.
- Allow each panel to rest and dry before applying the next.
These steps maintain balance between moisture and grip, keeping air pockets from forming under the surface. Modern matte designs, like those in the Abstract Floral Wallpaper Collection, showcase how smooth application enhances visual depth and clarity across every bloom.When to Seek Professional Help
If bubbles keep reappearing or multiple seams lift despite repairs, it may indicate hidden wall moisture or structural unevenness. A wallpaper professional can use precision tools, such as seam syringes and heat rollers, to restore flawless adhesion without damaging printed layers.
For first-time installers, guidance from Removing Old Wallpaper Before Installing Florals can help ensure a fresh surface before applying a new design, minimizing seam or bubble formation later.
Quick Comparison: Seam vs Bubble Issues
| Problem Type | Typical Cause | Repair Method | Prevention |
|---|---|---|---|
| Seam Opening | Weak edge paste | Reapply adhesive & roll flat | Maintain humidity balance |
| Air Bubble | Trapped air or uneven paste | Pin-prick & smooth outward | Apply evenly during install |
| Corner Curling | Wall moisture | Re-paste with vinyl adhesive | Seal walls before hanging |
| Repeat Bubble | Poor wall prep | Reapply adhesive, reseal area | Prime walls properly |
Maintaining a Flawless Finish
Regular care keeps wallpaper looking fresh for years:
- Dust gently using a microfiber cloth.
- Avoid harsh cleaners or excessive moisture.
- Inspect corners annually for early signs of peeling.
Rooms styled with blue floral or green botanical designs are particularly forgiving when maintained correctly, as demonstrated in the Blue Floral Wallpaper Collection and Green Floral Wallpaper Collection.
Conclusion
Fixing wallpaper seams and bubbles is all about timing and technique. Whether you’re repairing subtle gaps or correcting trapped air, patience and quality adhesive can restore your walls to their original charm. A smooth, polished surface not only highlights your wallpaper’s design but also enhances the atmosphere of your entire room.
Those refreshing their space after repairs can find enduring beauty and craftsmanship within the Floral Wallpapers Collection, featuring everything from soft watercolor petals to bold contemporary botanicals.